Can I continue the love for red?
I am officially announcing today the National Red Nail Polish Day! :D
Another nail art tutorial from yours truly!
I may not be a red lipstick wearer but hey! I can always start with the polish right?
Let me start the steps and I have to say again and again, I am in no way expert to nail art but I love doing it and I love sharing what I learn out of my own experience :) Enjoy!
Step 1:
Apply 2 coats of any bright red nail polish. In my case, I used The Face Shop's Red Polish

Step 2:
After the 2 coats of polish is dry, apply dots using a Nail Art Pen or any dotting tool to create petals.
Step 3:
Push in the dots using a needle to create a more detailed flower look
After the 2 coats of polish is dry, apply dots using a Nail Art Pen or any dotting tool to create petals.
Step 3:
Push in the dots using a needle to create a more detailed flower look

If you're nails are as long as mine or longer, apply more dots to create more flowers. Check out photo below

Step 4:
Apply a different colored dot for the flower bud

Step 5:
Apply a green polish shaping a teardrop as an illusion of leaves. Does not have to be perfect.
Apply a green polish shaping a teardrop as an illusion of leaves. Does not have to be perfect.

Step 6:
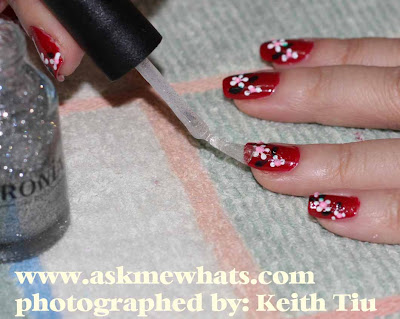
Making sure the nail art is dry. Thinly apply any glittery polish on top of the nail art. I use Caronia Silver Glitter Polish.
Making sure the nail art is dry. Thinly apply any glittery polish on top of the nail art. I use Caronia Silver Glitter Polish.

Step 7:
Apply a coat of Top Coat. I am using my favorite TFS Top Coat.

Here's as dainty and as red my nails can get Hope you like it!

Again, the flower nail art doesn't have to be perfect!
Seldom do we see flowers that are exactly alike in real life right?
Same with nail art :)
Stay happy!
Stay RED happy!
Seldom do we see flowers that are exactly alike in real life right?
Same with nail art :)
Stay happy!
Stay RED happy!


![[immer wieder sonntags] KW 20](https://blogger.googleusercontent.com/img/b/R29vZ2xl/AVvXsEiVODPmOSRk21tjrTYlPSunaEWG36gE8N1nCXh74UAAsoEs_dlyhxrM1GfWw32u2KN45NuIDWN28XkMrhSKfS0hZ0UQcu9vE6Q_L8ieO0JrqWBg6Rf5t3ZqPtCDKlBI4BQUj-BiUmVXFqU7/w100/Horse+orange.png)
0 Yorumlar